First, press the sleeves. (You're no doubt going to get tired of me going on about pressing. I get tired of pressing, but it gives much better results, so it's worth the faff.)
Next, hem the wrist placket. That's the opening in the side of the sleeve that lets you get your hand out through the cuff.
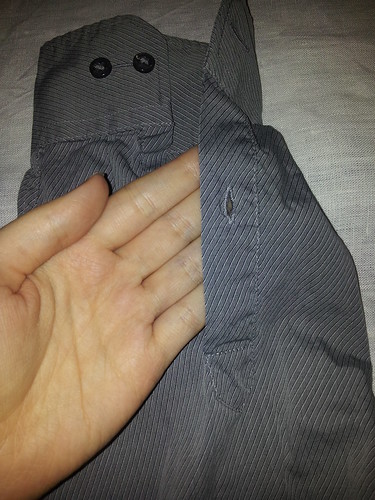 |
| The wrist placket of a modern shirt |
Unlike a modern shirt, where the underarm seam goes all the way to the wrist and the placket is cut into the intact fabric, the wrist placket of a Tudor shirt is worked as part of the underarm seam. Before the cuff goes on, the raw edges of the sleeve fabric need to be hemmed for the full length of the placket. On extant shirts the placket ranges from just over an inch to five inches; most are between three and four inches. My hands aren't much wider than my wrists, so I'm going to make mine three inches long.
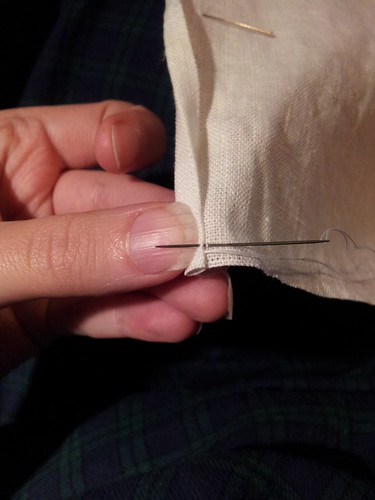
Making sure that you're measuring along the long side of the sleeve, place a pin to mark the length of your placket.
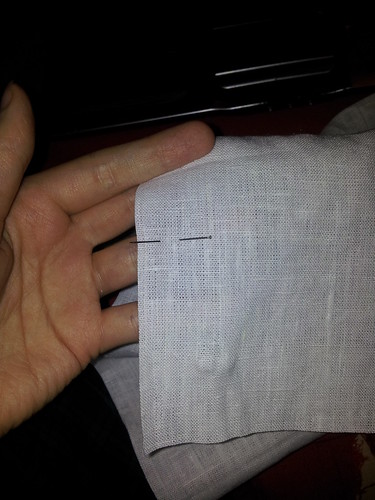 |
| Bonus points for not stabbing yourself |
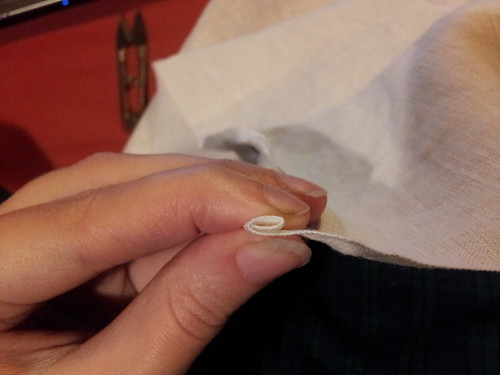
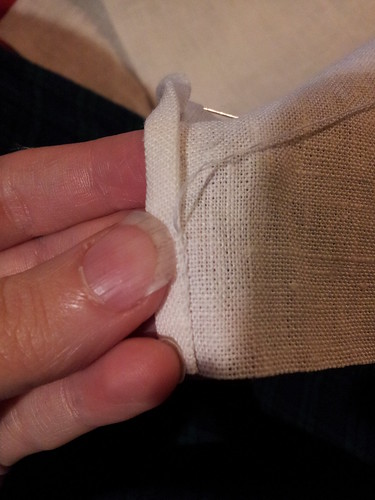
Press over the raw edge of the fabric along the length of the placket. I usually finger press all of my hems because I end up with straighter hems that way. If you are more skilled in the art of hot pressing, go for it.

Fold the fabric in again. This will completely encase the raw edge of the fabric.
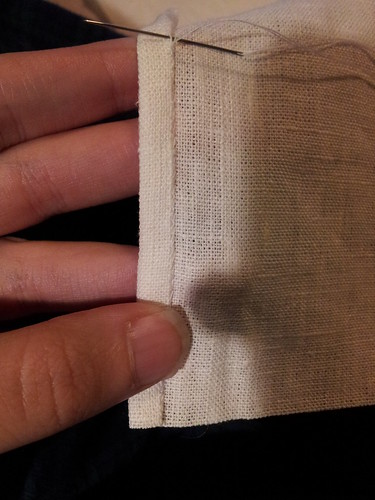
Insert your threaded needle into the opening inside the hem and out through the first fold you made. The needle should come out about an eighth of an inch away from the raw edge of the short side of the sleeve.
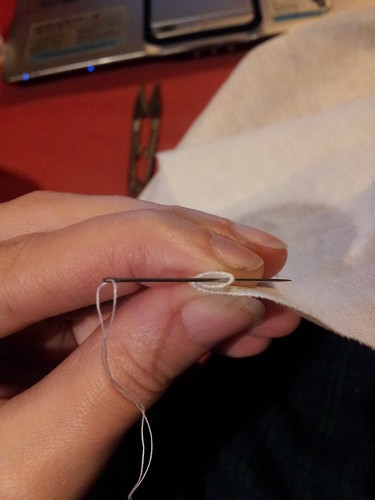

This will keep the knot at the end of the thread hidden inside the seam, and because it's away from the raw edge, won't pull out from the side.
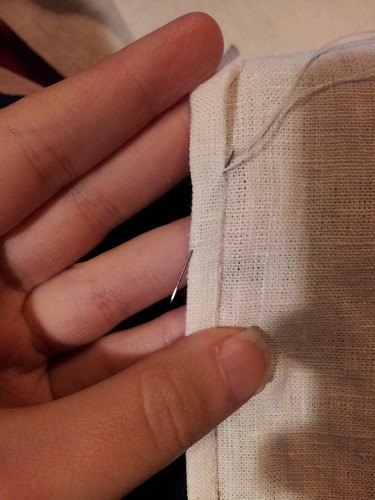
Next, whipstitch the hem. I take one thread from the flat piece of cloth and one thread from the folded edge of the hem, and make one stitch about every eighth of an inch.
As I go along the hem, I always pick up the same two threads. This lets me keep the hem perfectly straight. It sound tedious, I know, but you get into a rhythm and it's done before you know it.
Once the hem is done, it should be all but invisible on both sides.

Tie off the thread. You can trim it off next to the hem, but I always worry about it coming undone, so prefer to bury the end in the hem. Push the needle into the fold immediately under the end of the thread, down the inside channel of the hem, and out the fold on the far side. Make sure you don't push the needle all the way through to the front the the hem - if you turn your sleeve over, you shouldn't be able to see the needle on the fabric at all.
Pull gently on the thread so that the fabric is ever-so-slightly bunched up.

Clip the thread off against the fabric and smooth the fabric out flat. This will pull the end of the thread into the hem.
Do the same thing on the other side of the sleeve, making sure that you put the inside of the hem on the same side of the fabric as the first hem! Then do the same thing for the placket on the other sleeve.
No comments:
Post a Comment