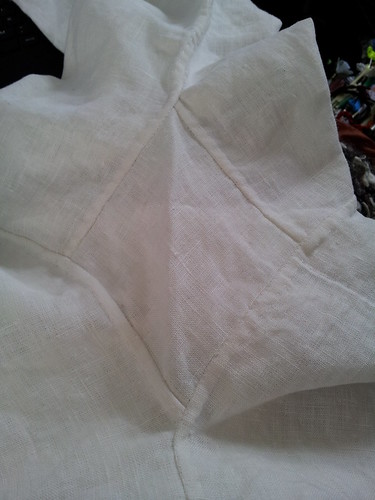
There are a couple of slight differences with what you need to do with the shirt, though. Before you start sewing, you need to press each seam towards the centre of the gusset. (You knew there would be more pressing, right?)
Then, clip the side of the seam allowance on the gusset side to a quarter of an inch.
Finally, rather than leaving the full hem flat as in the picture, fold it under itself around the clipped part, just like the shoulder gussets. The finished gussets should look like this:
As with the seams, don't go right up to the hemmed plackets. Dealing with that part comes next.
No comments:
Post a Comment